Selecting a tank is not a decision that should be made in isolation. At this point you probably already have an idea of where you would like to put the tank, such as on a dresser in your bedroom or office, or part of your living room or family room. In order to avoid costly or irreparable mistakes, I highly recommend that you should also have a good idea of the lighting and filtration for your future set-up. The goal of this article is to help you avoid some common mistakes, or mistakes that I have made, when accumulating the components of your system.

The Red Sea Reefer series aquariums are a popular choice for many new reefers because it includes just about every major piece of equipment that you will need and eliminates the need for major DIY projects.

Piecing together your own system: Size considerations

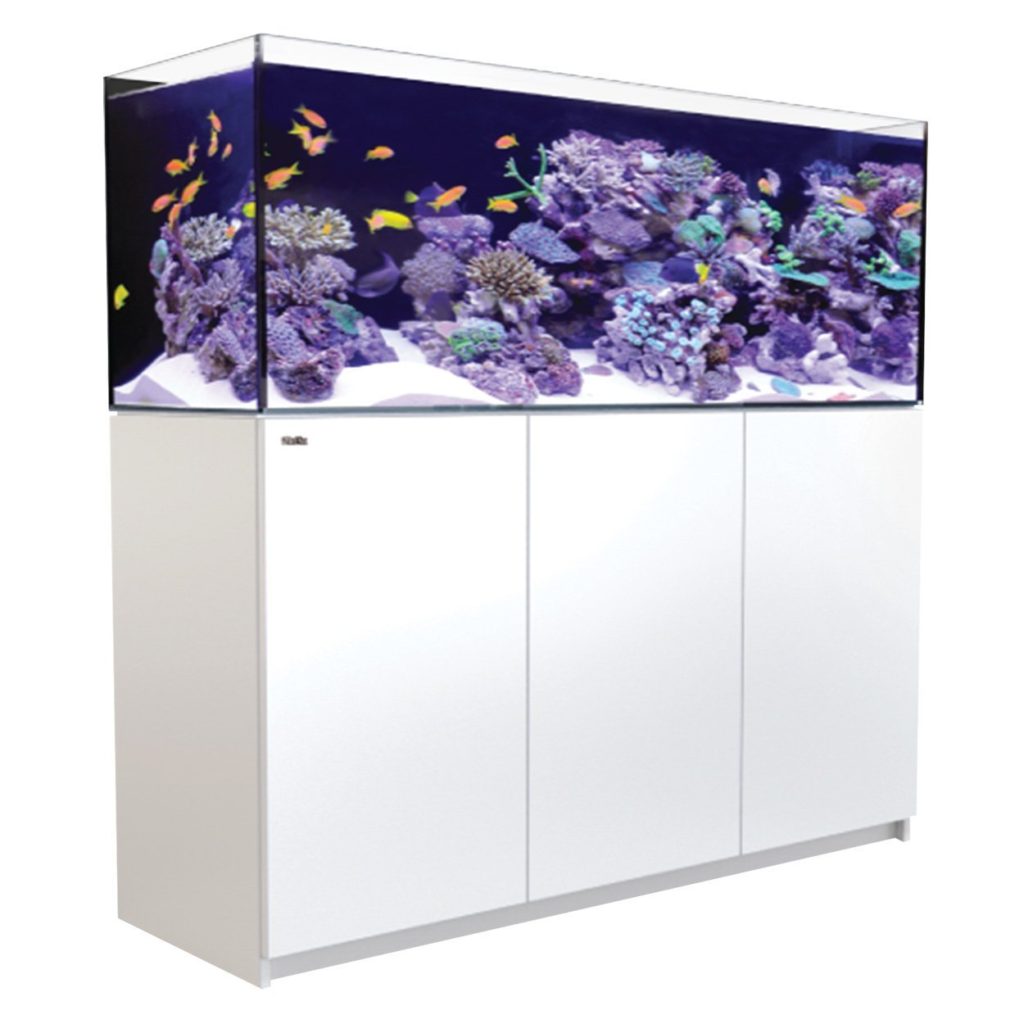
The location of your tank is likely going to dictate the general size of your aquarium but there is more to think about in terms of dimensions when designing your slice of the ocean. There’s a fundamental difference between tanks designed for fish-only applications and those for reef tanks. Aquariums that are designed for fish-only are made to show off the fish, so the footprint tends to be small while the height of the tank tends to be relatively tall. This forces, or encourages, the fish to swim upwards in plain view instead of hiding among the aquascape. A good example of this is the standard 55 gallon which appears to be a large aquarium because it’s 48″ long and 20″ tall, but front and back it’s very narrow at only 13 inches.

The ideal reef tank is the opposite. The footprint is more important for a few reasons. One reason is coral placement. Corals require light and you simply can’t have corals shading each. On a real coral reef the battle for well-lit real estate is essential for survival. Another reason that you need an adequate footprint is to utilize all of the light that your fixture emits. In other words, you want to keep all the light in the aquarium and minimize the light that spills into the room. When doing your research for lighting, you will find that many products advertise a general footprint that the fixture is designed to illuminate. A reason you don’t want a tall reef tank is because you will lose a lot of light intensity from the extra distance it has to travel. If you remember from physics, the intensity is inversely proportional to the square of the distance. Simply put, you lose a lot of light if it has to travel a long distance. Actually, you will find that some reefers prefer their reef tanks shallow. For dimensions of a reef tank, a good rule of thumb is that the height should not be longer than the depth (front-to-back dimension).

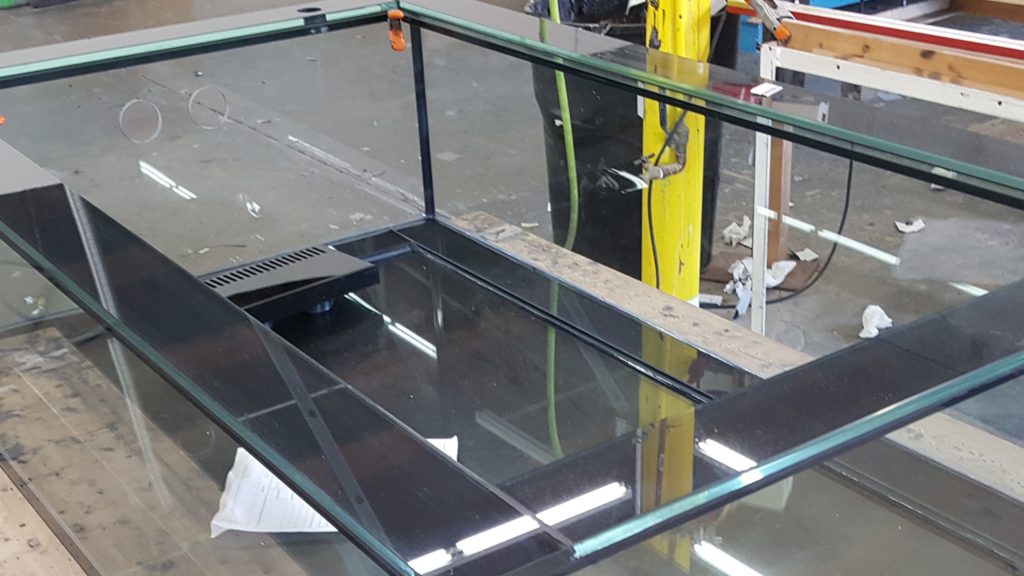
My first attempt at a reef tank was a standard 55 gallon, which was 48 inches long, by 13 inches front to back, and 20 inches tall. This was a nightmare to aquascape because of the narrow footprint, and it was grossly inefficient due to the massive light spill-over into the room. I bought this tank without even considering lighting options, which cost me more money in the long run. Don’t make this mistake when buying your first reef tank. If you’re going to go with a standard size Aquarium, 10g, 15g, 20g long, 40g breeder, 120g, 150g tank (60″x24x24″), 180g, 240g all have a good footprint for the volume. These “standard tank sizes” are manufactured by several companies, are fairly easy to find, and relatively inexpensive. Although I must note that it would need some some holes drilled into it for an overflow if you plan to run a sump in your system (discussed later).

Also noteworthy, you should avoid oddly-shaped tanks like bow-fronts, hexagons, etc. Though they may look interesting, they are not usually an efficient use of space and could be a challenge to light uniformly.

Piecing together your own system: Lighting considerations

It would be impractical to go over all the different lighting/tank combinations in this article, so I will resort to a generalization. If your tank is below 30 gallons, you will likely be going with some type of LED fixture(s). For tanks smaller than, say, a 30g cube, metal halide is simply too strong, and probably unnecessary. T5 bulb lengths start at 24 inches, so it would be a waste of light if the tank wasn’t at least that length.

When the footprint of the tank is 24 inches or greater, then it’s possible that other lighting solutions, or combinations thereof, may be appropriate. But as stated in my previous blog, for tanks that contain beginner corals, such as soft corals and LPS, LEDs make the most sense as long as you can get a good light spread over the whole tank without spending a fortune.

When deciding the dimensions of your reef tank, you should concurrently be thinking of the lighting.

The AI Prime and Kessil A160 are excellent choices for tanks smaller than 30 gallons, especially cube-shaped tanks.
AI Prime HD
Kessil A160

Piecing together your own system: Filtration

Having a good idea of the kind of filtration you plan to use is equally, if not more, important than knowing what type of lighting you’re going to have for your new reef tank. With the advent of protein skimmers in the 1990s, success in the reef aquarium hobby exploded. Protein skimmers are the staple of marine aquarium filtration and I will always try to incorporate one in any system.

Generally speaking again, you are going to need a protein skimmer for tanks over 30 gallons. This, however, really depends on the bioload in your system–how many fish you plan to put in your tank as well as your feeding habits. For tanks smaller than 30 gallons, you could probably get away without a protein skimmer if the bioload is small and feeding was kept to a minimum. You would probably have to do frequent water changes, but you can mitigate this chore by having quality live rock (biological filtration) and some sort of mechanical filtration, like a hang-over-the-back filter.

All-in-ones vs. sumps

There is a good number of “all-in-one” (AIO) reef ready aquariums around 30 gallons in size. These systems are usually cube-shaped aquariums with a false wall in back that sections off a slim compartment that could be used for filtration purposes. These systems may include a small protein skimmer and they have additional space for other filtration and a heater. All-in-one tanks are a solid choice for smaller tanks.

Fluval 13.5g All-In-One
Coralife Biocube, 16g or 32g

If you don’t have an AIO and you won’t have a sump, but still you want a skimmer, you would need a hang-over-the-back skimmer or in-tank skimmer. Alternatively, you can get away with a hangover the back mechanical filter as noted in the previous section.

AquaMaxx HOB Skimmer
Tunze 9004 In-Tank Skimmer
Reef Octopus HOB Skimmer

For tanks over 60 gallons, you are at the point where you’ll be better off with a sump to keep your protein skimmer. But this is not the only benefit of having a sump. Sumps are great for hiding/housing other equipment, for adding water volume, and making the maintenance on an aquarium much easier. Once you have a sump you will never go without one.

You will need to consider and plan for the placement of your sump. For smaller tanks this will be a little more challenging and will likely influence your stand design. Nevertheless, the extra planning and cost for a sump is all worth it in the end.

Reef Octopus skimmers are popular for their effectiveness at a low price-point.
Reef Octopus 110, In-sump skimmer
Reef Octopus 150, In-sump, space saving design

The rookie's regret: the overflow

If you’re adding a sump, you will need a overflow. The overflow itself not only brings water to the sump, it also increases the efficiency of the filtration equipment because it “skims” off the surface water, which is the portion of the water column that accumulates the oils and dissolved particulate matter.

The overflow is probably the most overlooked aspects of a reef aquarium for beginners. The biggest mistake that I see beginners make is buying a tank with a huge overflow that takes up too much real estate. A lot of “reef ready” tanks come with a huge “tower-like” overflow that spans from top to bottom of the tank, taking up valuable real estate. It boggles my mind that this is design is still around because its really outdated. Nowadays there are several manufacturers of low profile overflows that take up very little in-tank real estate and are very silent. All of my tanks in the future are going to have these low-profile overflows. If you are going to DIY your system, purchase a low-profile overflow like those below. In the grand scheme of things, a tower-like overflow is not the end of the world and may be unavoidable if you buy these mass-manufactured complete reef systems–at least until these companies get with the program.

Examples of low-profile overflows. Please note these will require holes drilled in your tank which can be done DIY or by requesting from your tank manufacturer or retailer.

Modular Marine Overflow
Eshopps Eclipse Overflow

My thinking process when designing a tank

If I was to set up a new reef tank, the first thing I would consider is a standard, mass-manufactured tank. The reason for that has to do with cost. Although much nicer, custom tanks are probably about 5 times as expensive as a standard tank. My current standard 120 gallon tank (4’x2’x2′) with the overflow(that I purchased separately), cost about $350. A custom tank about the same size would have been near or over $1,500. This cost difference may be worth it for some folks, since custom tanks will either be rimless or eurobraced, which looks much sharper, and are usually built strong enough to omit a center brace (depending on the size, of course). I would be remiss if I did not mention that converting a standard tank into a reef system will require a fair amount of DIY.

I prefer glass aquariums over acrylic, since acrylic scratches easily and is more difficult to clean. Hard coralline algae can be easily scraped off with a razor blade if you have a glass tank. To scrape coralline off an acrylic tank, many people use old credit cards; however this will require more elbow grease compared to a razor blade on a glass tank.

Acrylic tanks are more clear compared to glass, however you can buy a glass aquarium that has “low iron” or “Starphire” glass, which has less of a green tint. With that being said, many people, including myself, believe that the benefit of low iron glass will be negligible for tanks 1/2″ thick and below.

At this point in my reefing career, a sump is absolutely necessary.  Even my 20g long coral quarantine system has a 15g sump. It just makes maintenance so much easier. A sump fed by a low-profile overflow adds to the aesthetics of the tank by hiding the equipment while increasing the efficiency of filtration. They are silent, safe, and take up very little valuable real estate. I strongly recommend these types of overflows over the huge, tower-style overflows. In general, try to incorporate a sump in your system if it’s going to be over 30 gallons. Sumps also make it easier to add equipment as your experience and desires evolve to more difficult livestock.

Custom aquariums are very sharp, however can cost significantly more than a standard mass-manufactured aquarium.
For those who are not into DIY, the Red Sea Reefer and SC Aquariums are a popular choices for complete systems.
Red Sea Nano Kit
SC Aquariums 50g w/sump & skimmer
Red Sea Reefer
Red Sea Max Nano

In summary

Deciding on the tank size and dimensions should not be made in a vacuum.  You need to consider the filtration and lighting concurrently. Get a tank with an adequate footprint that is not too tall, and if you’re going to have a sump, choose an overflow with a low profile. If you are not into DIY, purchasing a complete system is a popular alternative, although it will cost significantly more.